Installing & Download Download Mediatek Preloader USB VCOM Drivers in Windows 7,8,10 is a hectic process because these drivers are not digitally signed and after Windows 8.1 Microsoft has disabled the installation of installing these unsigned drivers due to security measures. So in this tutorial, I am going to show you the process to first disable the Windows Driver Signature Verification and after that Install these drivers in a proper way.
Disable Windows Driver Signature Verification
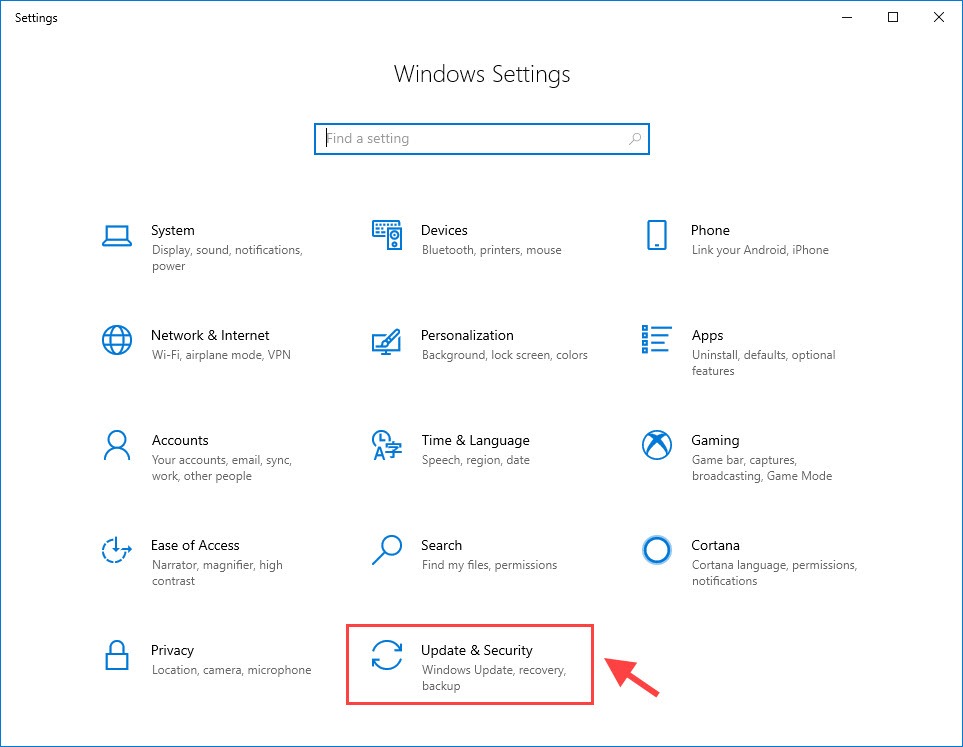
1) Click Settings and select Update & Security.
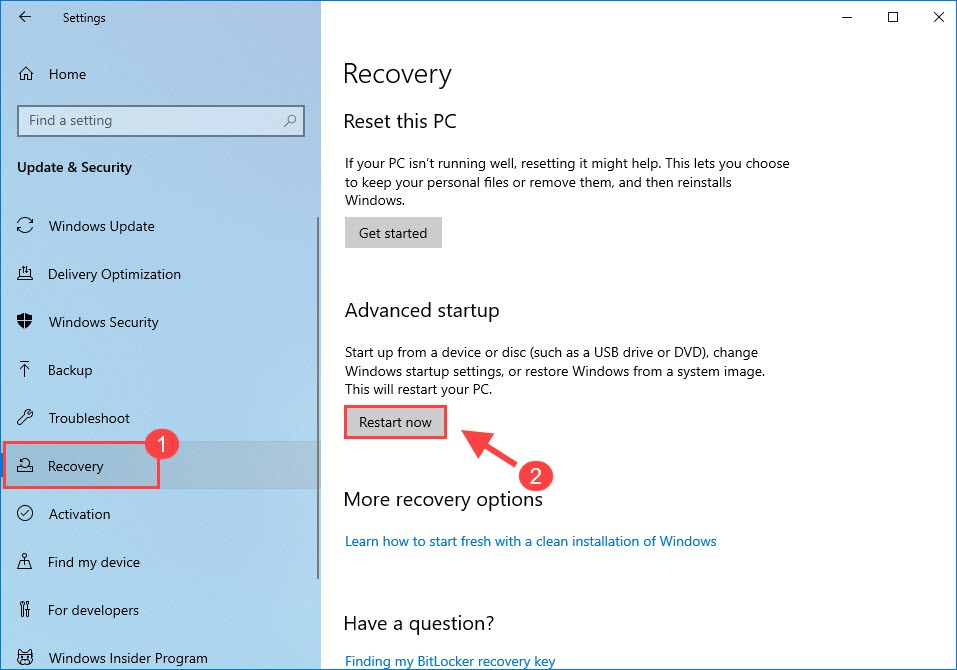
2) On the left panel, select the Recovery tab. Under Advanced startup, click Restart now.
2) After booting into advanced startup, select Troubleshoot > Advanced Options > Start-up Settings > Restart.
3) When you see Startup Settings, press number 7 or F7 on your keyboard to disable Driver Signature Enforcement. This will take about 3 minutes to boot.
3. Install the MTK driver manually
1) Type device manager in the search box and select Device Manager.

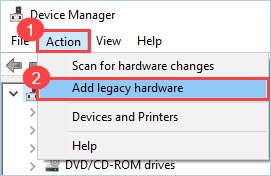
2) In Device Manager, select your PC name. Then click Action and select Add legacy hardware.
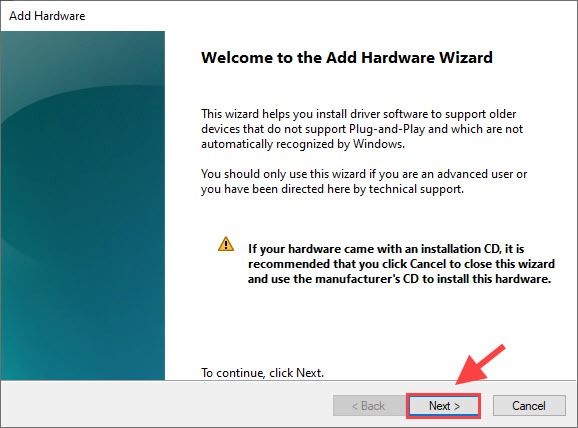
3) In the Add Hardware Wizard, click Next.
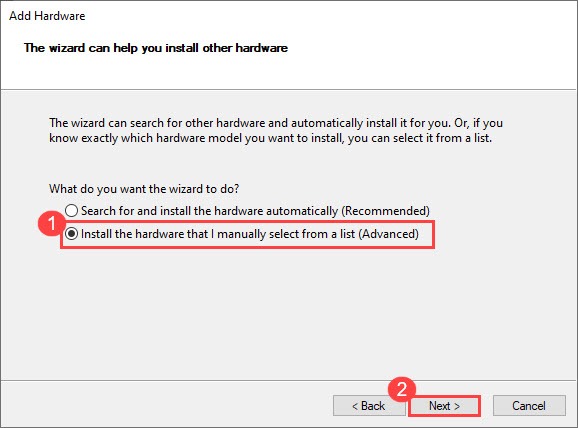
4) Tick the Install the hardware that I manually select from a list (Advanced) option and click Next.
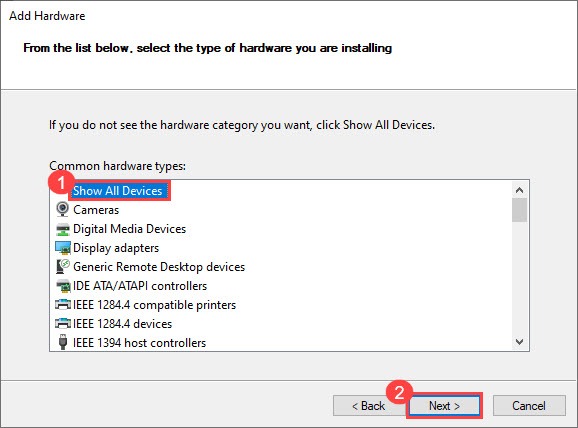
5) Click Show All Devices and then Next.
6) Select Have Disk and select the .inf file you extracted before.
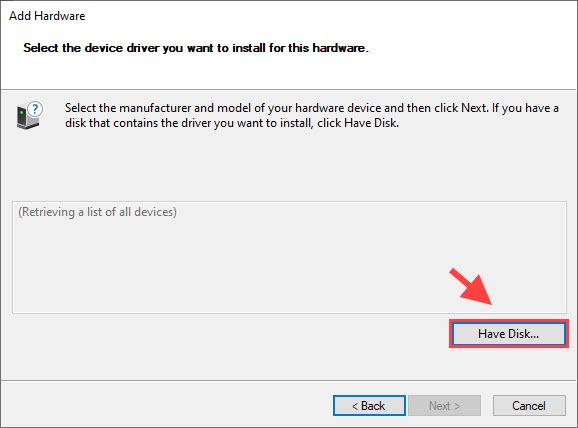
7) Select MTK_Driver_ext > SP_Drivers_v2.0 > Android > android_winusb inf.
8) Once selected, click OK. Then select the model you want and click Next to install. You can install all MediaTek drivers on your computer.
9) Restart your PC and connect your MediaTek device.
- Click on Start Button and click on Settings App or you can also do it by searching Settings in the Cortana Search.
- In the Settings Window click on Update and Security and then on Recovery Option from the left sidebar.
- You will find Advanced Start-up in Recovery Windows, just click on the restart now button below that.
- Your system will reboot and you will see a window asking for restart options, just click on Troubleshoot and then on Advanced Options.
- From the Advanced Options menu select Start-up Settings and click on the Restart button.
- After your system reboots you will see Star-up settings asking for the options, click on number 7 key on your keyboard to select Disable Driver Signature Enforcement.
- That’s it, Your system will reboot with disabled driver signature verification.
Note: Driver Signature Verification is disabled only for the current boot, it will be enabled again if you reboot.


0 komentar:
Posting Komentar